 Here is a piece in summary from a producers perspective, on how I record and mix background vocals.
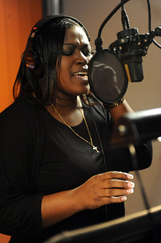
Sometimes your production will require a lush, thick layered background vocal. It could be layers of harmony, or counter melody, but the goal is the same, you are intending to envelop the listener in a 360 degree blanket of the human voice. A lot of decisions in this process will be made based on the song and its genre, the vocalist/s and the desired end product. I will try and cover as many bases as I can in this short posting, but you may find yourself with unique issues to overcome. Firstly you have to establish your goal: Let's say we are working on a pop ballad, it calls for a big lush chorus with a harmonized lead vocal and a harmonized counter melody. Let's assume that your singer is fairly proficient at working out the harmonies/counter (that's a whole different discussion that others are far more qualified to speak on), so we won't go into the musical theory side of things. My main concern would be the lead vocal not getting dwarfed by any new vocal layers, and a counter melody not taking away from the impact of the lead line. These are creative decisions that we will assume are made by others, or in pre production. Of course volume/panning and such will diminish the impact of layers that need to sit back, but if you are attempting to hide things you are recording, I doubt the validity of their inclusion! So we have all our layers planned out, next we have to decide who will sing them. Should the person singing the lead do backgrounds? In my experience that is often the best solution, but that again is a creative decision that should be decided case by case, and in preproduction. It's pointless me talking about the pro's and cons of each option, as it is so dependent on the vocalists and the song. Lets say we have the lead vocalist singing lead and background… If you don't have one already, I would suggest recording a pass through of the lead vocal, whether this is scratch or a take, it will give you something to reference against throughout the layering. Good communication with the singer is crucial, and as with any vocal session they have to have a good headphone mix and plenty of light to see any words/score. The booth shouldn't be too hot/cold. They need room-temperature water and ideally a sightline to you. Crunchy clothing, rattling jewelry, squeaky shoes all need to be sorted out. Now you are ready! If your vocalist was singing 5 inches from the mic for their lead, I would recommend moving back at least a few more to start with. Air is a great natural compressor, and the very tiny timing delay that occurs when a singer is picked up by a mic by standing further away is noticed by the listener, and is perceived to be further away (ideal!). If your mic has a high pass switch, use it! The low frequency buildup with upwards of 20 layers can be pretty wild and it saves you some plugin juice later on, if you don't need to do it then. Now talk with your vocalist and find out how much of the lead vocal (if any) they would like to sing with, some prefer to hear the lead as a guide for their part, others find this too distracting. If they are having a hard time sticking to their harmony, try reducing down the lead vocal, or give them more of their own mic. I find 3 good takes of each part are enough to give you plenty of options come mix time. But be sure to listen through each for timing, pitch and any word inaccuracies. When doing this I try and get layer 2 and 3 to match layer 1. So for example, by the time we are doing layer three, mute layer 2 and match it to layer 1. Matching layer 3 to 2, then 4 to 3 and so on can result in a big shift in timing/inflection etc... from layer 1 to 4, so try and be consistent with your references. You may also want to experiment with moving back a few inches with each layer which would give the perception of depth. However these layers will then not match (sound wise) so panning them Left, Center, Right, wouldn't work as well. You may want to try getting a few people in the booth, switching the mic to Omni and have the singers stand around the mic for extra layers to use for thickening purposes when mixing. This ragged effect can be pretty useful further down the line. Mixing! Colour coding is a quick way of keeping your brain on track when mixing all these parts, so maybe separate soprano, tenor, baritone etc… or harmony, counter melody, lead, whichever works for you. Pan to taste. This is dependent on so many factors, I can't give you a categoric answer to panning. A good starting point is LCR (Left, Center, Right) and then filling in 2 o'clock, 4 o'clock, 5 o'clock etc… However, you may want your harmonies on the left and your counter melody on the right with your lead right in the middle. Again, case by case. Output your layers to buses, so you may have a harmony bus, a counter bus, and then those buses to a background main bus. Solo safe your original layers so you can solo your buses as and when you need to. Then you can apply your processing to the buses and save yourself a load of computer resources. Now the time consuming part: You need to go through everything, clean up all the silence between vocals, adjust any timing discrepancies between takes, apply any retuning, and set your relative levels (to each of the other vocal layers). Once that is done you are now really looking at working on the buses with volume automation, EQ, compression, saturation, effects etc… Hopefully you have high passed on your way in on the mic or pre-amp, if not, do it now, and clean out any mud in the lower frequencies. I would also apply a low pass filter too, as removing sibilance and super bright sounds will help to sit the backgrounds back, and not interfere as much with the lead. I like to add a non pumping LA2A style compression to backgrounds, it levels them out without sounding too processed. And then fiddle around with EQ, effects etc… to get the sound you are looking for. If you find you need a thicker sound and you can't re-track any more vocals you can duplicate the layers you have and push and pull them back and forward in time by 10-20 samples here and there, and pan accordingly. Make sure they are not phasing, and check in mono for total phase cancellation. Now you can use the bus faders to place your backgrounds as far forward or back as you need to work in your song. This is how I work with backgrounds but as with all things recording and mixing, everyone does things at least a little differently. I hope this gave you some ideas for when you need a wall of background vocals on your next song. If you have any other tips, tricks or comments please let me know below! Thanks Jamie
1 Comment
|
Jamie Muffett
I am a British Producer, Mixer & Musician who is privileged to live in New York City. Archives
May 2014
Categories
All
|
 RSS Feed