 “In writing, you must kill your darlings.” --William Faulkner*
We all have our heroes who inspire us, but does this somehow hinder our own musical development? Sometimes it does, and that is what I want to talk about in this blog post. When I talk with artists about the development of their music, referencing their inspiration is part of the process and helps to explain their vision. "I'm kind of thinking Metallica meets early 2000's Shania Twain, you feeling me?". This is normal (maybe not that specific example), but this should only be a jumping off point. It's a way to start the process but should not become an obsession that informs every decision throughout, especially when the artist has only one source of inspiration. In the advertising and TV/Film world there might be a very good reason for using an unknown artist as a good “stand in” for a known. Financially speaking, paying for an unknown artist who sounds similar to a known is often a cheaper option. That's entirely different to being a unique artist in your own right. And being unique is my ultimate point. Everyone with access to a computer (so... pretty much everyone), is able to self-release their music to a saturated and often disinterested audience on social media. Apart from the obvious lack of originality and creativity, why would anyone be interested in an attempt at a Lumineers song when they could listen to an ACTUAL Lumineers song? And let me assure you, if you think you are cashing in on an artist's fan base by attempting to sound like them, I would be very careful. Fans especially can be very protective and hostile to artists they deem are attempting to muscle in on their hero's territory. When I start a new project with someone, we begin by discussing references and it gives us a jumping off point. This leads to new and fresh ideas and the end result can be unrecognizable from the artists we had discussed. Love him or hate him, John Mayer said this gem: "it's my failure to sound like my heroes that's enabled me to sound like myself". I'd love to hear your opinion on this: do you agree? Is there anything wrong with trying to produce music that sounds like your heroes? Are you doing yourself a disservice? Let me know... Thanks for reading. Jamie Jamie Muffett is a British Producer/Engineer/Mixer and musician working in New York City at Mercy Sound Studios in Manhattans East Village. *Thanks to Mike Thornton for this quote.
0 Comments
 Here is a piece in summary from a producers perspective, on how I record and mix background vocals.
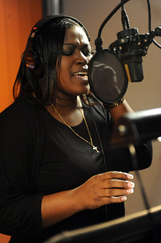
Sometimes your production will require a lush, thick layered background vocal. It could be layers of harmony, or counter melody, but the goal is the same, you are intending to envelop the listener in a 360 degree blanket of the human voice. A lot of decisions in this process will be made based on the song and its genre, the vocalist/s and the desired end product. I will try and cover as many bases as I can in this short posting, but you may find yourself with unique issues to overcome. Firstly you have to establish your goal: Let's say we are working on a pop ballad, it calls for a big lush chorus with a harmonized lead vocal and a harmonized counter melody. Let's assume that your singer is fairly proficient at working out the harmonies/counter (that's a whole different discussion that others are far more qualified to speak on), so we won't go into the musical theory side of things. My main concern would be the lead vocal not getting dwarfed by any new vocal layers, and a counter melody not taking away from the impact of the lead line. These are creative decisions that we will assume are made by others, or in pre production. Of course volume/panning and such will diminish the impact of layers that need to sit back, but if you are attempting to hide things you are recording, I doubt the validity of their inclusion! So we have all our layers planned out, next we have to decide who will sing them. Should the person singing the lead do backgrounds? In my experience that is often the best solution, but that again is a creative decision that should be decided case by case, and in preproduction. It's pointless me talking about the pro's and cons of each option, as it is so dependent on the vocalists and the song. Lets say we have the lead vocalist singing lead and background… If you don't have one already, I would suggest recording a pass through of the lead vocal, whether this is scratch or a take, it will give you something to reference against throughout the layering. Good communication with the singer is crucial, and as with any vocal session they have to have a good headphone mix and plenty of light to see any words/score. The booth shouldn't be too hot/cold. They need room-temperature water and ideally a sightline to you. Crunchy clothing, rattling jewelry, squeaky shoes all need to be sorted out. Now you are ready! If your vocalist was singing 5 inches from the mic for their lead, I would recommend moving back at least a few more to start with. Air is a great natural compressor, and the very tiny timing delay that occurs when a singer is picked up by a mic by standing further away is noticed by the listener, and is perceived to be further away (ideal!). If your mic has a high pass switch, use it! The low frequency buildup with upwards of 20 layers can be pretty wild and it saves you some plugin juice later on, if you don't need to do it then. Now talk with your vocalist and find out how much of the lead vocal (if any) they would like to sing with, some prefer to hear the lead as a guide for their part, others find this too distracting. If they are having a hard time sticking to their harmony, try reducing down the lead vocal, or give them more of their own mic. I find 3 good takes of each part are enough to give you plenty of options come mix time. But be sure to listen through each for timing, pitch and any word inaccuracies. When doing this I try and get layer 2 and 3 to match layer 1. So for example, by the time we are doing layer three, mute layer 2 and match it to layer 1. Matching layer 3 to 2, then 4 to 3 and so on can result in a big shift in timing/inflection etc... from layer 1 to 4, so try and be consistent with your references. You may also want to experiment with moving back a few inches with each layer which would give the perception of depth. However these layers will then not match (sound wise) so panning them Left, Center, Right, wouldn't work as well. You may want to try getting a few people in the booth, switching the mic to Omni and have the singers stand around the mic for extra layers to use for thickening purposes when mixing. This ragged effect can be pretty useful further down the line. Mixing! Colour coding is a quick way of keeping your brain on track when mixing all these parts, so maybe separate soprano, tenor, baritone etc… or harmony, counter melody, lead, whichever works for you. Pan to taste. This is dependent on so many factors, I can't give you a categoric answer to panning. A good starting point is LCR (Left, Center, Right) and then filling in 2 o'clock, 4 o'clock, 5 o'clock etc… However, you may want your harmonies on the left and your counter melody on the right with your lead right in the middle. Again, case by case. Output your layers to buses, so you may have a harmony bus, a counter bus, and then those buses to a background main bus. Solo safe your original layers so you can solo your buses as and when you need to. Then you can apply your processing to the buses and save yourself a load of computer resources. Now the time consuming part: You need to go through everything, clean up all the silence between vocals, adjust any timing discrepancies between takes, apply any retuning, and set your relative levels (to each of the other vocal layers). Once that is done you are now really looking at working on the buses with volume automation, EQ, compression, saturation, effects etc… Hopefully you have high passed on your way in on the mic or pre-amp, if not, do it now, and clean out any mud in the lower frequencies. I would also apply a low pass filter too, as removing sibilance and super bright sounds will help to sit the backgrounds back, and not interfere as much with the lead. I like to add a non pumping LA2A style compression to backgrounds, it levels them out without sounding too processed. And then fiddle around with EQ, effects etc… to get the sound you are looking for. If you find you need a thicker sound and you can't re-track any more vocals you can duplicate the layers you have and push and pull them back and forward in time by 10-20 samples here and there, and pan accordingly. Make sure they are not phasing, and check in mono for total phase cancellation. Now you can use the bus faders to place your backgrounds as far forward or back as you need to work in your song. This is how I work with backgrounds but as with all things recording and mixing, everyone does things at least a little differently. I hope this gave you some ideas for when you need a wall of background vocals on your next song. If you have any other tips, tricks or comments please let me know below! Thanks Jamie 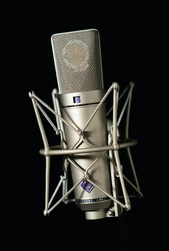 This is a short and very unspecific post from my Voiceover blog about microphone use in the VO world, and how you can use placement and mic choice to affect the sound of the recording, but it also applies to music so I am posting it here too.
There is a plethora of information about microphones and their use on the internet, as well as how and when to use different types, and I won't just repeat everything here. However I will give a brief synopsis, and direct you to some good resources. As this is a voiceover blog I will focus this toward that application, but most if not all that I am going to talk about applies to all other microphone use. First things first I am going to commit the ultimate sin of asking you to leave this page and read a very long document. But before you go please pay particular attention to the different types of microphone (dynamic, condenser, tube,ribbon) and the general characteristics and applications of these. Also take the time to really study the polar patterns. Here it is: http://en.wikipedia.org/wiki/Microphone OK so now I expect (if you have come back) you are somewhat sick of microphone talk, so I will stick to the big headlines and how it applies to the world of VO. Often in voiceover you will be using a large diaphragm condenser mic, this has a broad frequency response, by which I mean it hears way down low, and way up high (and everything in-between). You may occasionally come across dynamic mic's such as the SM7b or RE20 (often used in radio), they have a specific frequency range that compliments certain voices, but they are somewhat specific and have their limitations. As you have studied the Wikipedia page you are now aware that different mics have different polar patterns, and depending on what you are recording you will choose one polar pattern over another. Some mic's have one pattern, some give you the option of a few. Rejection A cardioid mic picks up sound in a mushroom shape around the front of the grill, so if you are speaking within this mushroom your voice will be within the mic's ideal range for sound pickup. Undesirable noises such as computer fans can be less intrusive if placed well outside of this region. We call this off axis rejection and it can be used to great effect. Another example is a mic with a Figure 8 pattern which has a very pronounced deaf region between the two pickup regions. Have a look at the polar patterns diagram on the Wikipedia page and you will see the range of options available, and how these can be used to your advantage. Proximity effect Sticking with a cardioid mic we also have to take into consideration the proximity effect. It is very simple, the closer you get to the mic, the more the mic will emphasize the lower frequencies in your voice. Radio DJ's will often get so close to the mic they give themselves lip burn on the grill in an effort to get a bass resonance to their voice. You can use this to your advantage if you don't have much bass in your voice, moving closer will exaggerate what you have. Conversely if your voice is boomy and muddy, moving back a few inches will reduce this bass buildup. However mics set to the omni pickup pattern do not have proximity effect. The benefit to this is that you can get up very close without a change in tone, you do not get any off axis rejection but as you are now right on the grill of the mic, the signal to noise ratio is very high (in favor of the signal!). The mic in omni mode is also much less likely to pop. Your mic may have a high pass filter switch. This simply removes ultra low frequencies (typically 100 cycles and below) from the mic signal before it hits your pre amp. This can help to avoid a muddy sound and possibly remove hum, or accidents like knocking the mic stand, or the rumble of a truck driving by outside. So there it is, a very brief outline of the microphone as used in the world of VO. The microphone is just one part of a chain of equipment and processes that go toward the finished product, but it is the first piece of equipment that your voice encounters and it has a huge impact on your finished product. If you have any questions or comments please feel free to reply here or shoot me a message. Until next time… Jamie This is not an in depth tutorial on how to master, more a brief explanation of the Studio One workflow. Having never used Studio One I can't give you a first hand review of the software, but from this video and its growing reputation as a new way of working in a DAW, it is something that can not be ignored. Mastering for me is a necessary evil, and I have great respect for mastering engineers. Studio One seems like it takes some of the pain out of the process, and I have never seen a product offer such global control over the whole album/EP sound. As a person who enjoys listening to an album top to bottom, this seems like a totally natural way of working, and is closer in workflow to a Wavelab product than Pro Tools. The video is produced by Graham Cochrone of The Recording Revolution, an excellent resource for all things recording. Although his main focus is the burgeoning home and project studio world, engineers and producers of all levels will find his incites useful and interesting.  Being likeable as an artist is a much overlooked skill, usually dominated by the desire to seem cool, aloof or too damn swaaag for all you bad bitches out there.
Being an artist is an exercise in being liked, not just being entertaining. People are far more likely to spend their time and money on you if you seem like a person worth investing in. It struck me this morning as I was watching a Kickstarter campaign video that the desire to be cool and quirky, backfired on the artist when it came time to speak to camera and their fan base directly, eyeball to eyeball. And of course ask for money! Even then the desire to seem cool seemed to intercept every moment of genuine personality and humility, to the point that it felt plain rude. The delicate balance of cool Vs likeability is certainly hard to pull off, but if you want a large and loyal fan base it is a balancing act that could be the difference between a career in music, and a career waiting tables. What do you think? I would love to know your opinions on the importance of likeability in music. Jamie Hey hey! So for my first proper blog post I am presenting a video that I produced about adding depth to a kick drum using the signal generator plugin that comes with every version of Pro Tools. I hope this is useful to you! Jamie |
Jamie Muffett
I am a British Producer, Mixer & Musician who is privileged to live in New York City. Archives
May 2014
Categories
All
|
 RSS Feed